Identify the Feature
Tapping into the advanced capabilities of the iPhone, we bring you a step-by-step guide to enable the Live Text feature. Get ready to unleash the power of text digitization, translation, and sharing right at your fingertips. Enhance your iPhone experience by understanding how to use the feature that brings your camera’s viewfinder to life.
The Steps
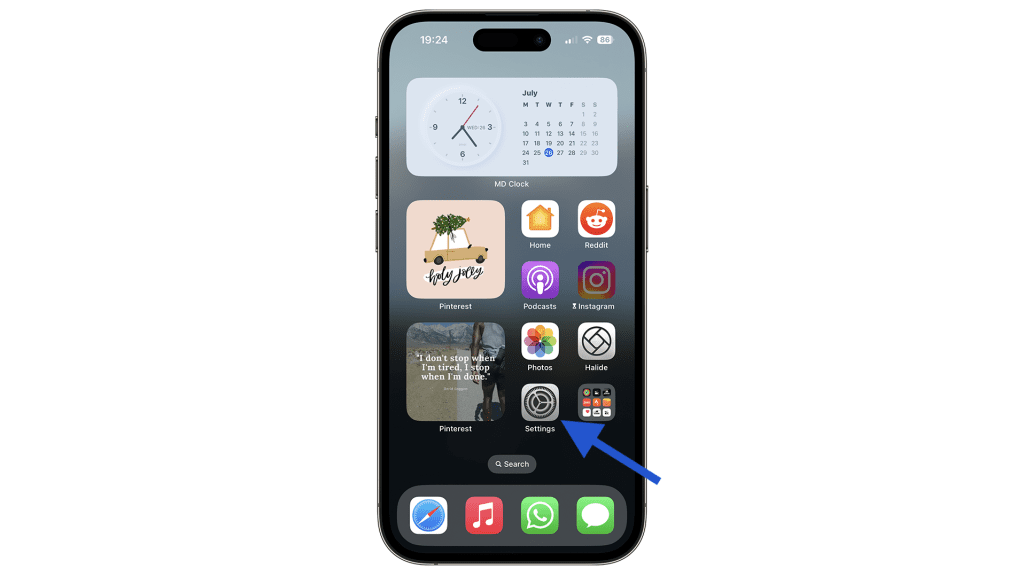
Step 1: Open the ‘Settings’ app on your iPhone. You’ll find it on your home screen with the gear icon.

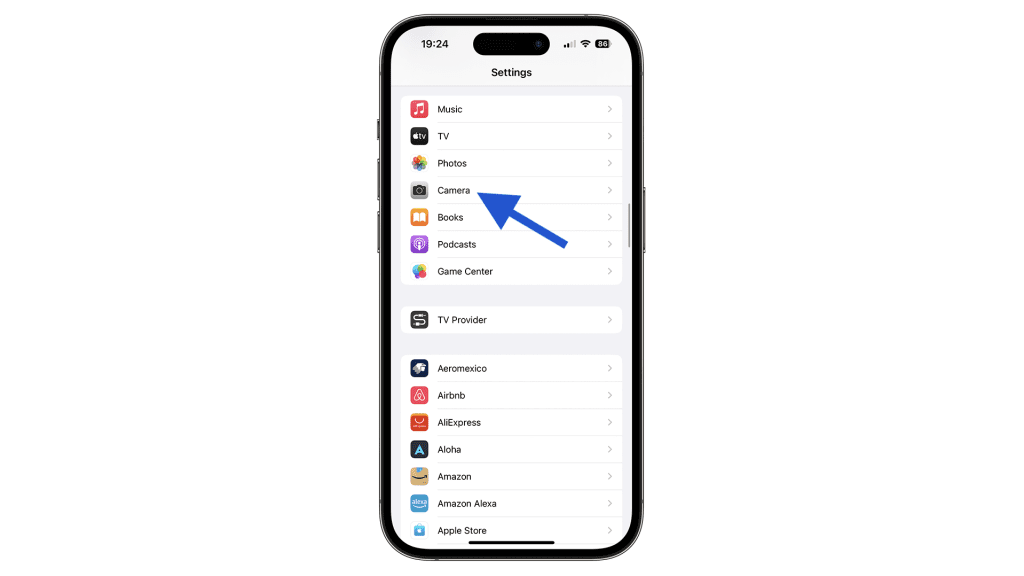
Step 2: Scroll down and tap on ‘Camera.’ This will open the settings specific to your iPhone’s camera.

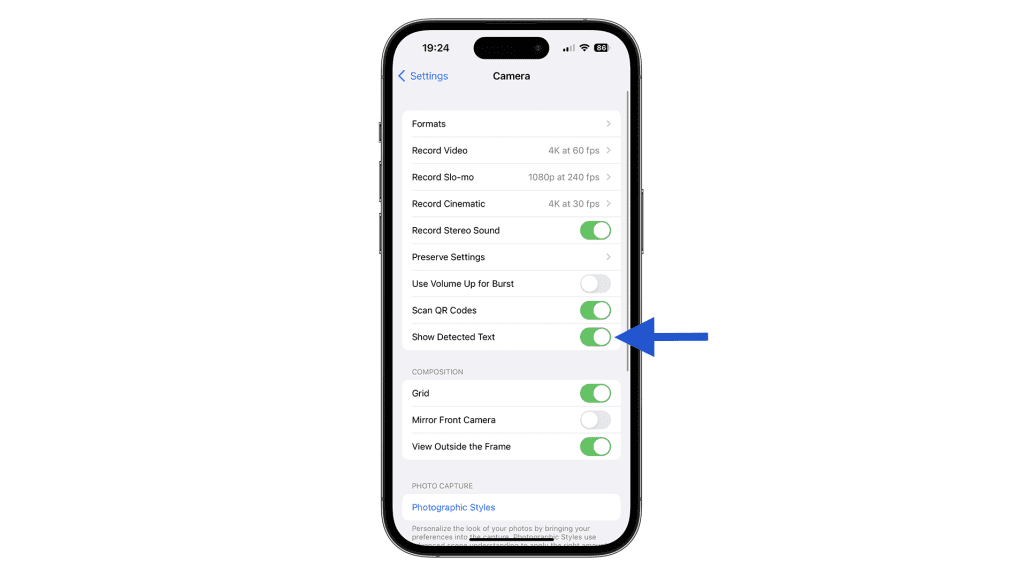
Step 3: Once you’re in the ‘Camera’ settings, you’ll see a list of options. Find the ‘Show Detected Text’ option.

Step 4: If the button next to ‘Live Text’ is not green, tap it to turn it on. If it’s already green, that means Live Text is enabled.
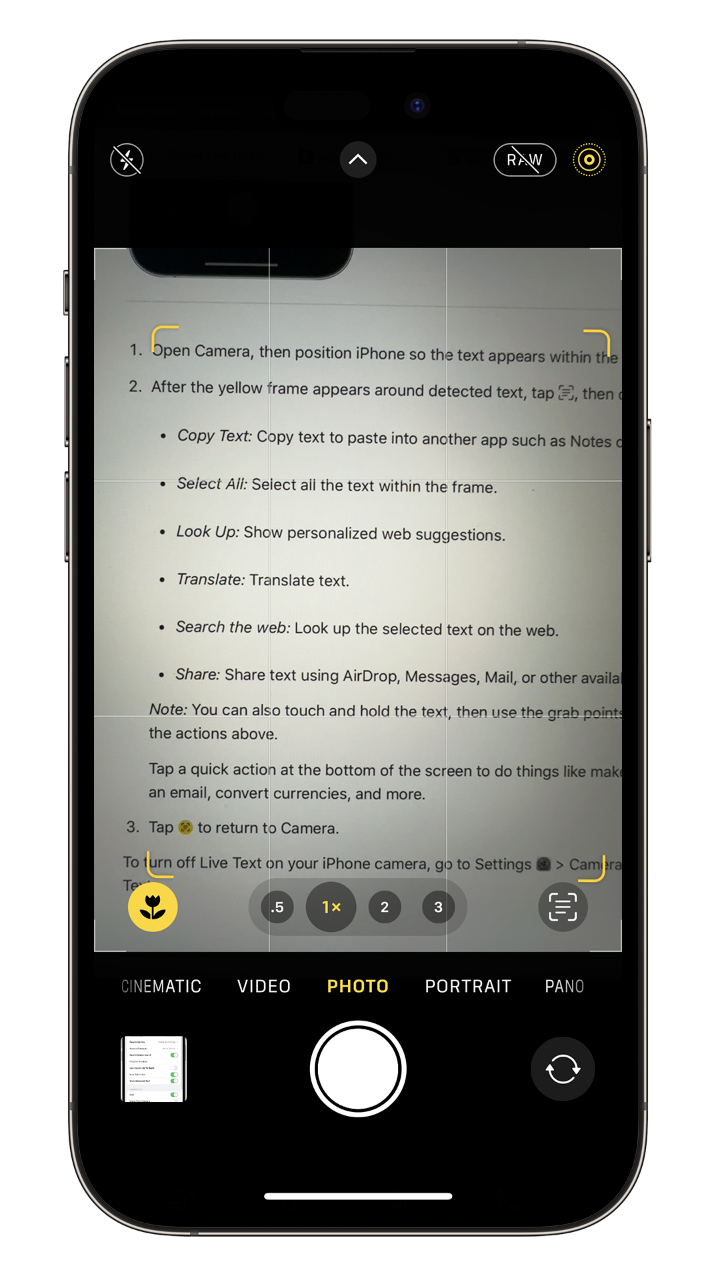
Now that Live Text is enabled, you can simply point your iPhone’s camera at a piece of text, and it will automatically detect it. You can then interact with this text as if it were digital: copy it, translate it, or share it.
Now that Live Text is enabled, you can simply point your iPhone’s camera at a piece of text, and it will automatically detect it. You can then interact with this text as if it were digital: copy it, translate it, or share it.
Remember, the ability to use Live Text is dependent on the model of your iPhone and the iOS version it’s running. Make sure your device is up-to-date to benefit from this feature and many others that Apple continually introduces to improve your user experience.


